Blender Tips
Since Babylon and Blender often do things differently, it can sometimes be a pain working with both of them together. Here's a few tips that will smooth things out a bit.
Geometry
Smooth shading
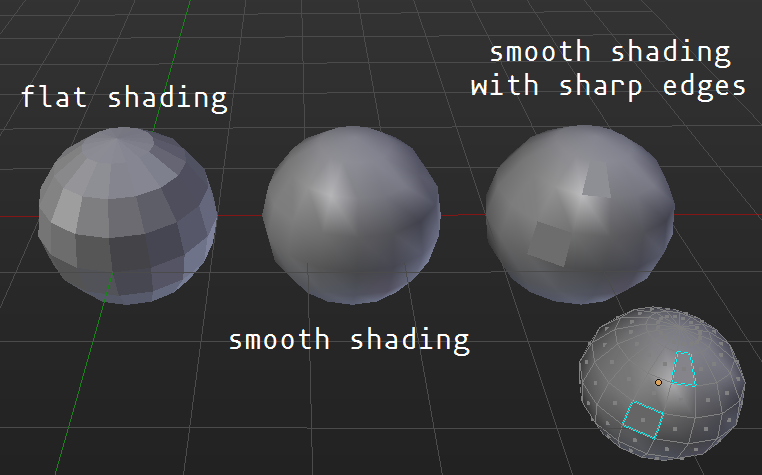
If you export the default Blender scene to BJS, you'll shortly see that your cube doesn't look like exactly as it should:

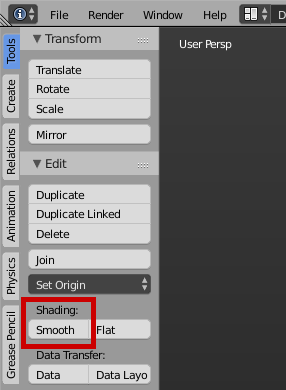
This is because a 3D modeler viewport don't act like a 3D realtime engine. By default, Blender always create object using flat shading mode. If you want to see your scene smoothed as in BJS, you have to select all your objects and click to Shading > Smooth in 3D View Toolshelf.
Now, you're cube looks ugly. You have to set up its sharpness, by adding an edge split modifier, and play with edge angle and sharp edges. Job done!
Cameras
ArcRotate
When choosing arc rotate camera type, you have to add a target to your camera.
To do that:
- first select your camera, then its target (object or empty for example),
- press
Ctrl+T>Track To Constraint.
Workflow
Quickly Export
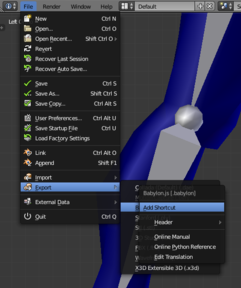
If you go to File > export and right click on babylon, you can select Create Shortcut, and make a easy to use shortcut to export to babylon! For example, you can use Ctrl-E.
Animation
Commons
One file per animated object
Usually, you will have one master scene containing all statics elements, and a blend file for each animated elements.
To easily see your animated element inside the master scene, open your master scene and go to File > Link, then go inside the blend containing the animated element, and import your objects. It can be more simple to link groups instead of objects, to update links in an easier way.
Rotation mode
By default, Blender use the XYZ Euler rotation mode, which is fine for most of cases, but you have to know that Quaternion (which avoid gimbal lock issue) is also supported.
XYZ Eulerwill be stored in the mesh.rotation propertyQuaternionwill be stored in the mesh.rotationQuaternion property
For armatures, it does not matter because the animation is kind of baked during export.
Armatures
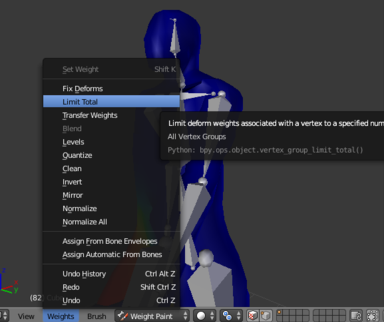
Maximum ## of influencers fix
If you ever get the error WARNING: Maximum ## of influencers exceeded for a vertex, extras ignored, never fear!
In weight painting mode, click weights and then limit total. This will automatically limit the mesh's vertices to 4 influences.