Bones and Skeletons
Bones and Skeletons
Babylon.js supports bones animations for your meshes.
Basically a skeleton (BABYLON.Skeleton) contains a hierarchy of bones (BABYLON.Bone). A bone is defined by a name, a parent (can be null) and a transformation matrix.
Here are the constructors:
BABYLON.Skeleton= function (name, id, scene)BABYLON.Bone= function (name, skeleton, parentBone, matrix)
Inside a skeleton, bones can be found inside the skeleton.bones array.
A bone can contain animations to animate its matrix property.
A bone must have its inverted absolute transform matrix set. If you are importing a skeleton this might already be computed. But if you are creating your own skeleton programatically you need to do this in your code.
The easiest way to do it is:
skeleton.returnToRest();Preparing mesh
A skeleton can be applied to a mesh through the mesh.skeleton property.
You should note that babylon.js supports up to 4 bones influences per vertex.
The mesh must also have additional vertices data:
- Matrices weights: 4 floats to weight bones matrices
(mesh.setVerticesData(BABYLON.VertexBuffer.MatricesWeightsKind, matricesWeights, false)) - Matrices indices: 4 floats to index bones matrices
(mesh.setVerticesData(BABYLON.VertexBuffer.MatricesIndicesKind, floatIndices, false))
The final matrix applied to each vertex is computed as follows:
finalMatrix = worldMatrix * (bonesMatrices[index0] * weight0 + bonesMatrices[index1] * weight1 + bonesMatrices[index2] * weight2 + bonesMatrices[index3] * weight3);On low-end hardware, the maximum bones influences per vertex is reduced to 3.
By default the system will try to store the bone matrices into a texture to save shader uniforms. If you still want to use shader uniforms, you can call:
skeleton.useTextureToStoreBoneMatrices = false;Loading bones
Skeletons and bones can be loaded from .babylon files.
Here is a sample of how to load a boned mesh and how to launch skeleton animation:
BABYLON.SceneLoader.ImportMesh("him", "Scenes/Dude/", "Dude.babylon", scene, function (newMeshes, particleSystems, skeletons) {  var dude = newMeshes[0];
  dude.rotation.y = Math.PI;  dude.position = new BABYLON.Vector3(0, 0, -80);
  scene.beginAnimation(skeletons[0], 0, 100, true, 1.0);});
A complete running example can be found here: Loading Bones
Cloning bones
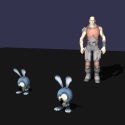
Bones and skeletons can be cloned (This is the case with the rabbits in the previous link).
Here is a sample of how to load and clone a mesh and its skeleton:
BABYLON.SceneLoader.ImportMesh("Rabbit", "Scenes/Rabbit/", "Rabbit.babylon", scene, function (newMeshes, particleSystems, skeletons) {  var rabbit = newMeshes[1];
  rabbit.scaling = new BABYLON.Vector3(0.4, 0.4, 0.4);  shadowGenerator.getShadowMap().renderList.push(rabbit);
  var rabbit2 = rabbit.clone("rabbit2");  var rabbit3 = rabbit.clone("rabbit2");
  rabbit2.position = new BABYLON.Vector3(-50, 0, -20);  rabbit2.skeleton = rabbit.skeleton.clone("clonedSkeleton");
  rabbit3.position = new BABYLON.Vector3(50, 0, -20);  rabbit3.skeleton = rabbit.skeleton.clone("clonedSkeleton2");
  scene.beginAnimation(skeletons[0], 0, 100, true, 0.8);  scene.beginAnimation(rabbit2.skeleton, 73, 100, true, 0.8);  scene.beginAnimation(rabbit3.skeleton, 0, 72, true, 0.8);});
Cloning Complex Models
More complex models, such as the Dude, contain submeshes. When cloning you must iterate and clone the submeshes as well. Here is an example of how to clone a more complex model:
BABYLON.SceneLoader.ImportMesh("him", "Dude/", "dude.babylon", scene, function (newMeshes, particleSystems, skeletons) {
    newMeshes[0].position = new BABYLON.Vector3(0, 0, 5);  // The original dude    scene.beginAnimation(skeletons[0], 0, 120, 1.0, true);
    dudes = [];
    for (i = 0; i < 10; i++) { // 10 clones        var xrand = Math.floor(Math.random() * 501) - 250;        var zrand = Math.floor(Math.random() * 501) - 250;
        var c = [];
        for (j = 1; j < newMeshes.length; j++) {            c[j] = newMeshes[j].clone("c" + j);            c[j].position = new BABYLON.Vector3(xrand, 0, zrand);            c[j].skeleton = newMeshes[j].skeleton.clone();            scene.beginAnimation(c[j].skeleton, 0, 120, 1.0, true);        }        dudes[i] = c;    }}
Picking a mesh attached to a skeleton
Because bones are computed by the GPU, the CPU has no clue where the mesh's vertices are. So picking a mesh with a skeleton will only work on the bind pose which could be sub-optimal.
You can decide to call mesh.refreshBoundingInfo(true) to force the CPU to update its local version of the mesh so that you can pick it correctly:
mesh.refreshBoundingInfo(true);var pickResult = scene.pick(scene.pointerX, scene.pointerY);Please keep in mind that this operation is using the CPU so it has to be used wisely as it could impact performance.
Attaching a mesh to a specific bone
Starting with babylon.js v2.2, you can now attach a mesh to a bone (like a sword in the hand of your character for instance). To do so, just specify on which bone with the following code:
sword.attachToBone(skeleton.bones[34], character);Please note that you also need to specify on which mesh the bone is currently applied. You can find a sample here: Attaching a Mesh To a Bone
When you attach a mesh to a bone in a skeleton, the mesh will be scaled by the same scaling factor as the parent mesh of the skeleton. This may not always be what you want. You may want to preserve the size of the of the mesh before and after attaching to a bone. To achieve this, scale the mesh appropriately before attaching it to the bone so that the net effect is to keep the size of the mesh intact before and after attachment. For example, if the parent mesh of the skeleton has a scaling factor (2, 2, 3) you have to scale the attached mesh by a factor (1/2, 1/2, 1/3) or (0.5, 0.5, 0.333 ).
The current position of the mesh in the world coordinates determines how far away the mesh will appear from the bone. If the mesh is far from the origin of the world, then it will appear far from the bone as well which, again, may not be what you want. So before attaching a mesh to a bone set its position to (0, 0, 0) or to a position close to world origin so that the mesh appears close to the bone and appears attached. The position of the mesh in this case simply acts as its offset from the bone.
Rotating, Positioning, and Scaling bones
Starting with babylon.js v2.5, you can easily position, rotate, and scale bones.
Bones can be rotated and positioned in local space and world space. To move a bone in world space, you must pass BABYLON.Space.WORLD and the mesh to the method. If a space isn't passed to the method, then the bone is moved in local space (relative to the parent bone).
Rotating
To rotate a bone around an axis, use the rotate function:
bone.rotate(axis, angle, BABYLON.Space.WORLD, mesh);setAxisAngle, setYawPitchRoll, setRotation, or setRotationMatrix are used to rotate a bone to a specific rotation.
bone.setAxisAngle(axis, angle, BABYLON.Space.WORLD, mesh);- setAxisAngle world space: SetAxisAngle World Space Demo 1
- setAxisAngle world space: SetAxisAngle World Space Demo 2
- setAxisAngle local space: SetAxisAngle Local Space Demo 1
- setAxisAngle local space: SetAxisAngle Local Space Demo 2
bone.setYawPitchRoll(yaw, pitch, roll, BABYLON.Space.WORLD, mesh);bone.setRotation(rotation, BABYLON.Space.WORLD, mesh);bone.setRotationQuaternion(quat, BABYLON.Space.WORLD, mesh);bone.setRotationMatrix(rotMat, BABYLON.Space.WORLD, mesh);Use getRotation or getRotationToRef to get the Vector3 rotation of a bone.
var rotation = bone.getRotation(BABYLON.Space.WORLD, mesh);var rotation = BABYLON.Vector3.Zero();
bone.getRotationToRef(BABYLON.Space.WORLD, mesh, rotation);Use getRotationQuaternion or getRotationQuaternionToRef to get the Quaternion rotation of a bone.
var rotationQuaternion = bone.getRotationQuaternion(BABYLON.Space.WORLD, mesh);var rotationQuaternion = BABYLON.Vector3.Zero();
bone.getRotationQuaternionToRef(BABYLON.Space.WORLD, mesh, rotationQuaternion);You can also use bone.rotation to set and get local space rotation quaternion.
Positioning
To change the position of a bone, you can rotate the parent bone, or you can leave the parent where it is and directly modify the position of the bone.
One way to do this is by translating the bone from its current position.
bone.translate(x, y, z, BABYLON.Space.WORLD, mesh);If you need to set the bone to a specific location, use setPosition.
bone.setPosition(pos, BABYLON.Space.WORLD, mesh);To get the position of a bone, use getPosition or getPositionToRef.
var pos = bone.getPosition(BABYLON.Space.WORLD, mesh);var pos = BABYLON.Vector3.Zero();
bone.getPositionToRef(BABYLON.Space.WORLD, mesh, pos);You can also use bone.position to set and get local space position.
Scaling
You can scale a bone on the local x, y, z axes of the bone (it is a cumulative effect).
bone.scale(scaleX, scaleY, scaleZ);The last parameter of scale is scaleChildren. Set scaleChildren to true if you want the scale to affect all the children / descendants of the bone. By default this parameter is off.
scale Children Examplescale is called on every frame, because the character's animation resets the scale of the bones.
The setScale function can be used to directly set a bone to a certain scale vector value.
bone.setScale(scaleVector);Use getScale or getScaleToRef to get the current scale of a bone.
var scale = bone.getScale();var scale = BABYLON.Vector.Zero();bone.getScaleToRef(scale);You can also use bone.scaling to set and get local space scaling.
Bone Controllers
Babylon.js v2.5 also introduced Bone controllers.
BoneLookController
The BoneLookController class is used to make a bone look toward a point in space.
With some bones, you will need to adjust the yaw, pitch, roll to get the bone to look in the right direction.
var target = BABYLON.MeshBuilder.createSphere();var lookCtrl = new BABYLON.BoneLookController(characterMesh, headBone, target.position, { adjustYaw: Math.PI * 0.5, adjustPitch: Math.PI * 0.5, adjustRoll: Math.PI });
scene.registerBeforeRender(function () { lookCtrl.update();});BoneIKController
Inverse Kinematics (IK) is used to rotate a chain of bones so that the end of the first bone is at or closest to a target point. It's often used to rotate the limbs of a character.
The BoneIKController class is modeled after Blender's IK Bone Constraint, but is currently limited to 2 bones.
To use the BoneIKController, you must first create a target mesh and a pole target mesh.
var target = BABYLON.MeshBuilder.CreateSphere("", { diameter: 5 }, scene);var poleTarget = BABYLON.MeshBuilder.CreateSphere("", { diameter: 2.5 }, scene);The bones will reach for the target mesh and the position of the pole target will determine how the joint between the bones will bend.
You most likely will want to parent your character to the pole target mesh so that it will move relative to the character.
poleTarget.parent = characterMesh;The BoneIKController constructor takes the mesh of the character, the bone that will be closest to the target, the target, and an options param. The currently list of options are:
targetMesh, poleTargetMesh, poleTargetBone, poleTargetLocalOffset, poleAngle, bendAxis, maxAngle
var ikCtrl = new BABYLON.BoneIKController(characterMesh, forearmBone, { targetMesh: target, poleTargetMesh: poleTarget, poleAngle: Math.PI });To use the controller, simply call the controller's update function before the scene is rendered.
scene.registerBeforeRender(function () { ikCtrl.update();});If you used a mesh for a target, you can hide it by setting enabled to false.
target.setEnabled(false);poleTarget.setEnabled(false);Performance considerations
Bones are computed using shaders by default. This allows better performance. But on low end devices, shaders could be limited and not able to process bones. You can in this case ask Babylon.js to compute bones using CPU by setting mesh.computeBonesUsingShaders = false.
Warning: mesh.computeBonesUsingShaders = false is incompatible with morph targets! If you have to use morph targets, you must set mesh.computeBonesUsingShaders to true!
Debugging
Starting with Babylon.js v4.0, you can use the Inspector to turn skeleton viewer on and off.
Debugging Extras
Starting with Babylon.js v4.2, you have a few more options to debug a skeleton with. We now have incorporated additional bone views, to help visualize the position of the bones which are accessible through the same means as explained in the above sections' Inspector link. Additionally two new methods have been added to construct ShaderMaterials for both a skeleton map and assigned bone weights.
New Viewer Info
There are some requirements to take into consideration when trying to use the view modes for the skeleton viewer. First the SkeletonViewer class accepts a new constructor argument of options that will dictate the visual look of the debug mesh. Through this new argument there a bunch of new options to configure the outcome. Note that this is not a required parameter and if omitted then the debug mesh will use classic lines system.
There are some differences in with the new views from how the old lines view functioned. With the old method, for each bone per frame the points are updated and the line system is redrawn with its buffer being updated (all of which happens on the CPU). The new views are a unified mesh that match the matrices of the skeleton system. There is some impact at creation time to properly create the buffers, but once that is done it offers more performance and less impact as it is handled after inception by the GPU. Keep in mind to make sure your skeleton has proper restPose Matrices bound and updated, otherwise the debug mesh will fail to position itself correctly.
let skeletonView = new BABYLON.Debug.SkeletonViewer( skeleton, //Target Skeleton mesh, //That skeletons Attached Mesh or a Node with the same globalMatrix scene, //The Scene scope false, //autoUpdateBoneMatrices? mesh.renderingGroupId > 0 ? mesh.renderingGroupId + 1 : 1, // renderingGroupId options, //Configuration Options);To configure some of how the parsing happens you can change these values. Also take note that the options for the display modes lives here as well.
let options { pauseAnimations?: boolean, //True or False flag to pause the animations while trying to construct the debugMesh. Default: True returnToRest?: boolean, //Flag to force the skeleton back into its restPose before constructing the debugMesh. Default: False computeBonesUsingShaders?: boolean, //Tell the debugMesh to use or not use the GPU for its calculations, if you ever want to do picking on the mesh this will need to be False. Default: True useAllBones?: boolean, //Visualize all bones or skip the ones with no influence. displayMode?: number //A value that controls which display mode to use. (SkeletonViewer.DISPLAY_LINES = 0, SkeletonViewer.DISPLAY_SPHERES = 1, SkeletonViewer.DISPLAY_SPHERE_AND_SPURS = 2). Default = 0. displayOptions?: any //The visual parameters for the debugMeshes.};In order to configure the new views display options, we have these new parameters.
let displayModeOptions { sphereBaseSize? : number, //The size of the sphere when scaled by the sphereScaleUnit after determining the longest bone in the system. Default = 0.15 sphereScaleUnit? : number, //The number that is used to determine the ratio of the spheres scale in relation to the longest bone in the system. Defaults to 2, with general assumptions that 1 scene unit is treated as 1 meter (you can assume what ever scene unit though). sphereFactor? : number, //A scalar that makes the spheres get smaller the farther away from the root bone they are. Default = 0.865 midStep? : number, //The number that represents where the bones 'spur' will be at its maximum thickness. Default = 0.235 midStepFactor? : number, //The ratio of how thick the bone should be in relation to its length. Default = 0.155 showLocalAxes? : boolean, //Flag to display te bones local axes as line systems. Default = False localAxesSize? : number, //Size of the local Axes. Default = 0.075};Debug Shader Usage
Sometimes you will need to actually see whart parts of your mesh a certain bone is influencing. When this need arises we've got you covered with some nifty new ShaderMaterials!
SkeletonMap Shader
The first one, which is a color map of the entire skeleton, is called a SkeletonMap. This will show you a unique color for each bone and visual feedback of how all of their influences interact. It's static method and when creating one, it expects two parameters, options and scene.
let mapShader = BABYLON.Debug.SkeletonViewer.CreateSkeletonMapShader(options, scene);Inside the options you must pass a skeleton key and value. A secondary optional argument for generating the color gradient for the bones is called as colorMap.
let options = { skeleton : BABYLON.Skeleton, colorMap? : any[]};In order to leverage the color map you will need to pass in an array of objects with this format:
let colorMapItem = { color: BABYLON.Color3, //The Color to use location: number, // Where on the gradient it is. Between 0-1};This array is expected to have the items arranged with their location value in ascending order.
Skeleteon Map ShaderBoneWeight Shader
The second of the two will show more specific data on a per bone basis.
let boneWeightShader = BABYLON.Debug.SkeletonViewer.CreateBoneWeightShader(options, scene);Inside the options you must pass a skeleton key and value. Optional arguments are for color control and the starting selected bone.
let options = { skeleton : BABYLON.Skeleton, colorBase? : BABYLON.Color3, //The color when a bone has 0 influence. Default = Black colorZero? : BABYLON.Color3, //The color when a bone has > 0 influence < 0.25. Default = Blue colorQuarter? : BABYLON.Color3, //The color when a bone has >= 0.25 influence < 0.5. Default = Green colorHalf? : BABYLON.Color3, //The color when a bone has >= 0.5 influence < 0.75. Default = Yellow colorFull? : BABYLON.Color3, //The color when a bone has >= 0.75 influence <= 1. Default = Red targetBoneIndex?: number //The bone._index value that you wish to display. Default = 0};The bone that is to be displayed is controlled by setting a uniform on the shader.
boneWeightShader.setFloat(targetBoneIndex, index);Sharing Skeletons Between Skinned Meshes
Multiple skinned meshes can reference the same skeleton, sometimes with different skinned mesh transforms. This is important for some scenarios, such as populating a crowd. Due to this, skeleton bone methods involving absolute transforms require the associated skinned mesh as an argument.
Here are two Bone methods that require the associated skinned mesh:
bone.getPositionfor world spacebone.getRotationfor world space
Failing to pass in the associated skinned mesh can potentially result in unexpected behavior since the math will not take the skinned mesh transform into account. This effectively computes transforms relative to the skeleton root instead of absolute transforms.
For example, consider this playground which loads the dude model with multiple skinned meshes pointing to one skeleton. This is loading the same model as referenced from earlier in this page.
In this case, all of the skinned meshes have the the identity transform and any of these meshes passed to Bone methods will be equivalent, but this is not always the case.
Using the following code, the arms of the dude has been moved by 30 units on the x axis. A box has been placed with a matching transform of the bone to visually see the transform. Note that the associated skinned mesh is being passed to getPosition and getRotation.
const mesh = scene.getMeshByName(" / 3");mesh.position = new BABYLON.Vector3(30, 0, 0);
const box = BABYLON.MeshBuilder.CreateBox("box", { size: 3}, scene);const bone = scene.getBoneByName("bone30");scene.onBeforeRenderObservable.add(() => { box.position.copyFrom(bone.getPosition(BABYLON.Space.WORLD, mesh)); box.rotation.copyFrom(bone.getRotation(BABYLON.Space.WORLD, mesh));});This is what happens if the mesh is not passed in as an argument to the get methods.
scene.onBeforeRenderObservable.add(() => { box.position.copyFrom(bone.getPosition(BABYLON.Space.WORLD)); box.rotation.copyFrom(bone.getRotation(BABYLON.Space.WORLD));});The box is in the wrong place (i.e., the math does not take the skinned mesh position shift of 30 units into account). This is also what happens when showing the gizmos for the bone because the gizmo doesn't know which skinned mesh is associated with the bone either.
It is important to identify the associated skinned mesh and then pass it to the bone methods to get absolute transforms. Depending on the model, there may be multiple skinned meshes that correspond to the skeleton. Without knowing the specifics of a model, the best a generic algorithm can do is narrow the list of possible skinned meshes to the ones that reference the target skeleton. In this example, the code is filtering the loaded meshes by the ones matching the first skeleton.
var skinnedMeshes = meshes.filter(function (mesh) { return mesh.skeleton === skeletons[0];});One of these will be the correct mesh to pass to the bone to get absolute transforms. It is up to the user loading the model to decide which is the correct one.
Note that some engines (e.g., Unity3D) and glTF do not support sharing skeletons between skinned meshes with different transforms because the skinned mesh transforms are ignored in these cases. If nothing is modified after loading from a glTF, any of the filtered list of skinned meshes should work as the skinned mesh argument to a bone method for getting absolute transforms. In this case, selecting the first mesh of this filter works for glTF assets. See this issue and linked issues for more detailed analysis of shared skeletons in glTF and glTF Skinning for more details about glTF skinning in Babylon.js.